რომანო ერთ-რთი უძველეი ყველია მსოფლიოში - ყველი, რომლის ფესვები სავარაუდოდ ჯერ კიდევ ეტრუსკული პერიოდიდან სწვდება რომაული კულტურისა და მის მიმდებარე არეალს
პეკორინო რომანო არის ტრადიციული იტალიური ცხვრის ყველი, რომელიც ჯერ კიდევ ძველი რომაელი ლეგიონერების რაციონში შედიოდა. ეს არის ყველი, რომლის ფესვები სავარაუდოდ, ჯერ კიდევ ეტრუსკული პერიოდიდან სწვდება რომაული კულტურის არეალს. მისი დამზადების უძველესი ჯერ კიდევ ქრისტეშობამდელი ორიგინალური რეცეპტი აღწერილი აქვთ რომაელ მწერალსა და მეცნიერს მარკუს ტერენციუს ვარონ რეატინუსსა და რომაელ ბუნებისმეტყველ ფილოსოფოსს, “ბუნების ისტორიის” (Naturalis Historia) ავტორს პლინიუს უფროსს [გაიუს პლინიუს სეკუნდუსი], როგორც რომაული ლეგიონერების რაციონის უმნიშვნელოვანესი პროდუქტი ,რადგან იგი, როგორც ცხიმების, ცილებისა და მარილების წყარო, უზრუნველყოფდა ჯარისკაცის სასიცოცხლო მოთხოვნილებებს ლაშქრობების მძიმე პირობებში. იტალიაში, ტოსკანაში, ეს ყველი იწარმოება ცხვრის რძისაგან და მისი დავარგების ვადა 5 - 12 თვეა. იგი მარილიანი ყველია. მარილების მაღალი შემცველობა უზრუნველყოფდა ყველის ხანგრძლივი შენახვის შესაძლებლობას
არსებობს სამი სახის ყველი რომანო (Romano):
Pecorino Romano [პეკორინო რომანო], რომელიც მზადდება ცხვრის რძისაგან,
Vacchino Romano [ვაჩინო რომანო] - ძროხის რძისგან და
Caprino Romano [კაპრინო რომანო] - თხის რძისგან
ცხვრის რომანო თოვლივით ქათქათაა, ოდნავ მარცვლოვანი ტექსურით. მას მკვეთრი, გამოხატული, მარილიანი გემო აქვს და უმთავრესად სხვა კერძებზე დახეხილი გამოიყენება, თუმცა არა მხოლოდ.
ძროხის რძის რომანოს ნაღების მსგავსი, ბუნებრივი ძროხის რძისთვის დამახასიათებელი, კრემისფერი აქვს.
ყველი
Romano ადგილწარმოშობის პროდუქტია და მას როგორც ეროვნულ, იტალიურ, სიმდიდრეს სახელმწიფო იცავს.

Romano Cheese
Romano is a cheese that has been mentioned extensively throughout history. Columella, who wrote De Re Rustica during the first century (one of the most important Roman agricultural treatises) mentions in detail Romano cheese and how it was made. Apparently at that time it was already an ancient cheese.
Romano doesn't really refer to Rome the city, but to the Romans, who were already making this cheese 2000 years ago. It was produced in Latium (the region around Rome) up until 1884, when, due to the prohibition issued by the city council against salting the cheese inside their shops in Rome, many producers moved to the island of Sardinia. Also, as the population in the north of Italy increased, the cheese makers couldn't meet this demand with their existing flocks around Rome and since not all pastures give the proper milk, they searched elsewhere for pastures that would work, finding them in southern Tuscany (Marema) and in Sardinia. Pecorino Romano isn't simply made from sheep's milk, but from the milk of sheep that have grazed pastures with specific combinations of grasses that impart specific flavors to their milk.
Today Sardinia is the center where the Consorzio per la Tutela del Formaggio Pecorino Romano, the organization that oversees the production of Pecorino Romano, has its offices.
Romano cheese has traditionally been heavily salted. The high salt is what preserves the cheese in the warm Mediterranean climate of central and southern Italy. Before refrigeration there were only two options to keep cheese from going bad:
Eating the cheese fresh before it went bad.
Heavily salting the cheese to keep bacteria and molds from developing.
This is most likely why the cheese has not been considered a table cheese but is largely used in cooking. The high salt of the cheese was used in place of salt additions for the food. Even today we find Romano used as a grating cheese added to other foods.
A Piquant Cheese:
Romano is also known to be a "spicy" cheese and at times I even think it is a bit "hot" from longer aging giving a very strong peppery aspect to the cheese even when red and black peppers are not added to it. This "piquant" character is not only a flavor but it is also an aroma that can be more than strong at times. If you have ever been in an Italian market either here or in Italy and near the aged Provolone you might know this aroma.
Where does this flavor come from? Traditionally when made from sheep's milk, a special rennet paste was used. This was made by feeding milk to the lamb just before slaughter. When the stomach is removed and tied off, the natural rennet in the stomach will coagulate the milk. In addition, the lambs endocrine system would secrete an enzyme known as Lipase into the digestive tract and to the stomach. Lipase is an enzyme that works to break down fat (lypolysis) and provides the strong flavors of this cheese. Using the paste from this stomach would introduce the enzymes to the milk during cheese making.
Using Lipase Today:
Rennet paste is still used today for traditional cheese making in Italy. However, this rennet paste is not allowed to be used here in America due to our regulations, and in large scale production in Italy its use is not practical for most cheese makers.

However, lipase can be obtained as a freeze dried powder today and meets the regulation standards here in America. It is extracted from the endocrine system of a calf for the "mild" version and from the goat for the "strong" version. It should, however, be re-hydrated in water before use but I find that a small amount of milk works just as well.
A Recipe for Making A Cow's Milk Version of Romano Cheese
The process of making this cheese has not changed much in over 2000 years. As Columella wrote in De Re Rustica during the first century AD:
"the milk is usually curdled with lamb or kid rennet, though one can use wild thistle blossoms, càrtame, or fig sap. The milk bucket, when it is filled, must be kept warm, though it mustn't be set by the fire, as some would, nor must it be set too far from it, and as soon as the curds form they must be transferred to baskets or molds: Indeed, it's essential that the whey be drained off and separated from the solid matter immediately. It is for this reason that the farmers don't wait for the whey to drain away a drop at a time, but put a weight on the cheese as soon as it has firmed up, thus driving out the rest of the whey. When the cheese is removed from the baskets or molds, it must be placed in a cool dark place lest it spoil, on perfectly clean boards, covered with salt to draw out its acidic fluids."
Modern cheese makers use heaters rather than the fireplace, and use calibrated molds rather than baskets. The basic process is unchanged; the curds are heated to 45-48C (113-118F), the curds are turned out into molds and pressed, and the cheeses are then salted. (As you can see, not much has changed through history.)
Although Romano cheese is traditionally made in Italy from ewe's milk (Pecorino) the following recipe is prepared for a 2 gallon version of cows milk (which would technically be called Vacchino Romano).
Normally I make this in a 5 gallon batch (as seen in the photos) to provide a larger cheese mass with less rind, but for those just starting out, a 2 gallon batch is a smarter plan.
Before You Begin:
You will need:
2 gallons of milk (not ultra-pasturized)
Either 1.25% of a prepared Yogurt-Y1 (3.2 oz.) OR 1/2 packet of our Thermophilic C201 culture
Mild lipase (optional)
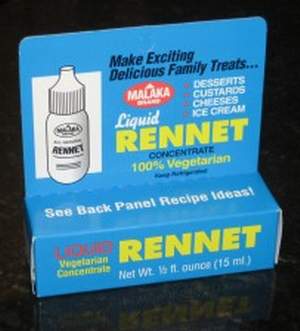
Liquid rennet (1/2 tsp -- 2.5 ml)
Salt
Calcium chloride for pasteurized cold stored milk
A good thermometer
A knife to cut the curds, and a spoon or ladle to stir the curds
Mold M3 mold w/ follower
Some butter muslin to drain the curds
A cheese press or weights to apply sufficient weight for consolidation of the curds.
Everything needs to be clean and sanitized.

Acidifying and Heating the Milk:
If using lipase with cow's milk, a lower fat milk should be used. I find a blend of 1 gal 1% plus 1 gal whole milk should give a starting fat content of about 2.2%. If not using lipase, a full fat milk may be used.
NOTE: If you do use the lipase remember to rehydrate this in 4 oz. of the milk you are using before heating the milk. (I know the instructions say to use water but I have found that milk works as well.) 1/8-1/4 tsp. depending on how much of this flavor you desire.


Begin by heating the milk to 90F (32C). You do this by placing the milk in a pot or sink of very warm water. If you do this in a pot on the stove make sure you heat the milk slowly and stir it well as it heats.
NOTE: I have included 2 options for culture. The prepared Yogurt-Y1 culture contains an additional culture (bulgaricus) and will offer a better ripening than the C201.


Adding the prepared yogurt culture to the milk.
Once the milk is at 90F, the culture can be added. To prevent the powder from caking and sinking in clumps, sprinkle the powder over the surface of the milk and then allow about 2 minutes for the powder to re-hydrate before stirring it in.
The re-hydrated lipase can then be added after the culture is stirred in. Stir this in as well.
Allow the milk to ripen at 90F for 60 min.
Coagulation with Rennet:

Once the milk has ripened, add about 1/2 tsp -- 2.5 ml of single strength liquid rennet.
The milk now needs to sit quiet for 24-30 minutes while the culture works and the rennet coagulates the curd. The thermal mass of this milk should keep it warm during this period. It is OK if the temp drops a few degrees during this time.
You should notice the milk begins to thicken (flocculate) at about 12 minutes but wait until a firm curd forms in 24-30 minutes. This will be a soft curd to allow for the small cut size to follow.
Cutting Curds and Releasing the Whey:
Once a firm curd has formed, cut to corn size and allow to shrink with cooking to the size of a barley grain. The small curd size will allow the cheese to dry out much more quickly during the cooking process. The drier cheese is what allows it to be aged longer and to develop its complex, nutty and piquant flavor. Cut the curds in both directions at 1" spacing vertically, then allow to sit for 2-3 min. before the final cut to the smaller curd size.
Following the cut, stir gently for 10 min. to allow the fresh curd to firm before heating.
Initially the fresh cut curds will look very soft but as they are slowly stirred they will firm up well to endure the cooking phase.
Then increase the heat to 116-118F over the next 40 min. The total cooking time will be 50 minutes. As the curds dry out they will become firmer and can withstand a more vigorous stirring. At around 108-112F they will have a tendency to mat, so make sure you keep them well stirred.
The final curds should be cooked well through and should be examined to make sure that enough moisture has been removed. A broken curd should be firm throughout and the curds should have a moderate resistance when pressed between the fingers.
Then, stir until firm curds (10-20 min.), let curds settle to the bottom and consolidate for 10 minutes.
Removing the Whey:
50% of the whey can now be removed from the kettle to help consolidate in the vat. I simply use a piece of Ricki's ripening mat to bring the curd mass into a compact mass on one side of the kettle (see photo), pressing it with medium hand pressure. This will help to eliminate small mechanical openings in the finished cheese.


I then simply roll this mass into a cloth, allow it to drain for a few seconds and transfer to the sanitized mold that has been prepared in advance.


The curds should be pressed into the mold with medium to firm hand pressure to help with the initial shape, the cloth pulled up evenly around the side. The curd mass needs little weight (similar to parmigiano) because the curd will still be quite sweet going into the mold. 8-15 lbs should be sufficient for this cheese. This only needs to be applied for 5-6 hours.


During this time, the cheese should be removed, turned and placed back into the cloth and mold at intervals of .. 30--30--60--60--60 min.
As the acid continues to develop, the cheese will tighten and form a smooth surface in the mold .
In the beginning, the rate of whey running off is simply a matter of drops and not a stream of whey being released. This is a good rate of whey removal during pressing and will slow even more as the residual free moisture is released. The form should show tears of whey weeping from the form very slowly. When this stops you can increase the weight slightly. The cheese should be removed from the press, unwrapped, turned, re-wrapped, and put back to the press at the above intervals to assure an even consolidation. At each turn you will notice the cheese has formed a smoother surface and rests lower in the mold.
When this cheese was made traditionally in their very large forms, sharpened wooden sticks were driven down through the curd to help release the whey but as the form settled and consolidated, these openings would seal again.
It is essential to keep the cheese warm 85-95F to promote the acid development of the final curd. This can easily be done by placing the draining cheese back in the pot with warm whey in the bottom. Raise the form, though, to keep the draining cheese out of the hot whey. Another option is to place the weighted form into an insulated cooler with warm bottles of water (again raised up out of any draining whey).
The weight should be removed and the cheese held overnight allowing the cheese body to cool to room temp during this time since the residual heat inside will promote the bacteria converting any remaining lactose to lactic acid.
Next morning the cheese should be ready for brine salting.
Salting:
You should have a saturated brine prepared for salting this cheese.
You will find all of the details you need on brining here.
A simple brine formula is:
1 gallon of water to which is added 2.25 lbs of salt, 1 tbs. calcium chloride (30% solution), and 1 tsp. white vinegar.
The cheese now needs to be set in the brine for 4 hrs per lb. This is a very salty cheese.
The cheese will float above the brine surface, so sprinkle another teaspoon or 2 of salt on the top surface of the cheese.
Flip the cheese and re-salt the surface about half way through the brine period.
At the end of the brine bath, wipe the surface and allow the cheese to surface dry for a day or two before waxing. The surface will darken somewhat during this time.
Allow to air dry for 2-3 days in a room moist enough (65-75%) to keep the rinds from cracking. Turn the cheese 1-2 times each day to even out moisture.

Aging:
Make sure any mold is wiped away daily as it develops. A cloth damp with brine will help with this.
Keep mold brushed off as the cheese ripens and re-apply oil as the surface dries down.
Age for at least 6 months and up to 24 months for more character.
You will see, it is well worth the wait!
 http://www.cheesemaking.com/Romano.html"
Podpuszczka (inaczej: rennina, chymozyna) - enzym trawienny, który znajduje się w dużych ilościach w śluzówce żołądka cielęcego. Jest ona wykorzystywana w mleczarstwie do produkcji serów podpuszczkowych. Istnieją także podpuszczki roślinne, znajdujące się w niektórych sokach i tkankach roślin oraz grzybów. Od czasów antycznych powszechnie znaną substancją wywołującą proces ścinania mleka jest sok figowy. Obecnie w użyciu znajdują się także podpuszczki syntetyczne.
http://www.cheesemaking.com/Romano.html"
Podpuszczka (inaczej: rennina, chymozyna) - enzym trawienny, który znajduje się w dużych ilościach w śluzówce żołądka cielęcego. Jest ona wykorzystywana w mleczarstwie do produkcji serów podpuszczkowych. Istnieją także podpuszczki roślinne, znajdujące się w niektórych sokach i tkankach roślin oraz grzybów. Od czasów antycznych powszechnie znaną substancją wywołującą proces ścinania mleka jest sok figowy. Obecnie w użyciu znajdują się także podpuszczki syntetyczne.


 .
.

 სიბრძნით ნაშობი რწმენა იმედი და სიყვარული
რწმენა ჭეშმარიტების გააზრებული, შემეცნებაზე დაფუძნებული, შეგრძნებაა და არაფერი აქვს საერთო გულუბრყვილობასთან. რწმენა სიბრძნის ნაყოფია.
სიბრძნდან გამომავალი გონისმიერი რწმენა უდევს საფუძვლად სასოებას ამიტომ იმედი თავადაც სიბრძნის "შვილია".
სიყვარული როგორც სიკეთე ვერ იქნება მიამიტი და უგუნური. პირიქით იგი დინჯი უნდა იყოს, გონისმიერი. ფრთაშესხმული სიყვარული კიდევ უფრო მეტად საჭიროებს გარემოებათა გააზრებას, გონიერ განსჯას. სიბრძნეა სიყვარულის სათავე
რწმენა, იმედი და სიყვარული გახლავთ "ცივი გონების" სამი ცხოველმყოფელი ნაყოფი. სიბრძნე ის საუნჯეა რომელიც რწმენით, იმედითა და სიყვარულით გვაჯილდოვებს
განუხვენ კარნი სოფიას და ისტუმრე: პისტი, ელპიდე, აღაპი ...
Pistis, Elpis, Agape ...
სიბრძნით ნაშობი რწმენა იმედი და სიყვარული
რწმენა ჭეშმარიტების გააზრებული, შემეცნებაზე დაფუძნებული, შეგრძნებაა და არაფერი აქვს საერთო გულუბრყვილობასთან. რწმენა სიბრძნის ნაყოფია.
სიბრძნდან გამომავალი გონისმიერი რწმენა უდევს საფუძვლად სასოებას ამიტომ იმედი თავადაც სიბრძნის "შვილია".
სიყვარული როგორც სიკეთე ვერ იქნება მიამიტი და უგუნური. პირიქით იგი დინჯი უნდა იყოს, გონისმიერი. ფრთაშესხმული სიყვარული კიდევ უფრო მეტად საჭიროებს გარემოებათა გააზრებას, გონიერ განსჯას. სიბრძნეა სიყვარულის სათავე
რწმენა, იმედი და სიყვარული გახლავთ "ცივი გონების" სამი ცხოველმყოფელი ნაყოფი. სიბრძნე ის საუნჯეა რომელიც რწმენით, იმედითა და სიყვარულით გვაჯილდოვებს
განუხვენ კარნი სოფიას და ისტუმრე: პისტი, ელპიდე, აღაპი ...
Pistis, Elpis, Agape ...
 .
.